Getting started with Arduino 12/17/14
For years I’ve wanted to try my hand at physical computing. I spend the majority of my waking hours writing code for websites in high-level languages
An Arduino kit, at the most basic level, is a simple programmable computer that you can combine with components like lights, speakers, and buttons
void setup() {
// Set up pin 13 (the one connected to a LED)
// to be an output
pinMode(13, OUTPUT);
}
void loop() {
digitalWrite(13, HIGH); // Turn on the LED
delay(1000); // Wait for one second
digitalWrite(13, LOW); // Turn off the LED
delay(1000); // Wait for one second
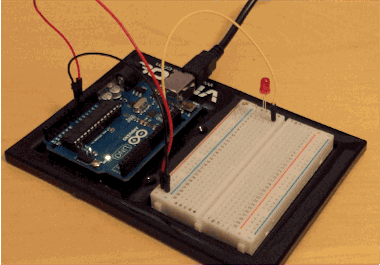
}This is the result:
Other projects from the kit are a bit more complex. In other lessons you learn how to speed up the blinking LED with a potentiometer, play a tune on a speaker, read the temperature from a temperature sensor, and more. Once you’re comfortable enough, you can start combining the components and code into whatever you’d like.
Arduino is an inexpensive way to learn about electronic circuits and programming, and I wouldn’t hesistate recommending it to anyone that’s interested in physical computing. To get started, all you’ll need is a decent kit, and a computer that can upload programs to the Arduino board through a USB port. No soldering required!